CloudMiningROI Simulator Manual v2.00.00_dev23
This manual explains the newest user-facing features in the CloudMiningROI simulator in a simple, practical way. It is written for people who want to know where each feature is, how to use it, what to enter, and what result to expect.
CloudMiningROI is a community project and not a for-profit product; donations help keep the simulator available and updated.
1. Start here
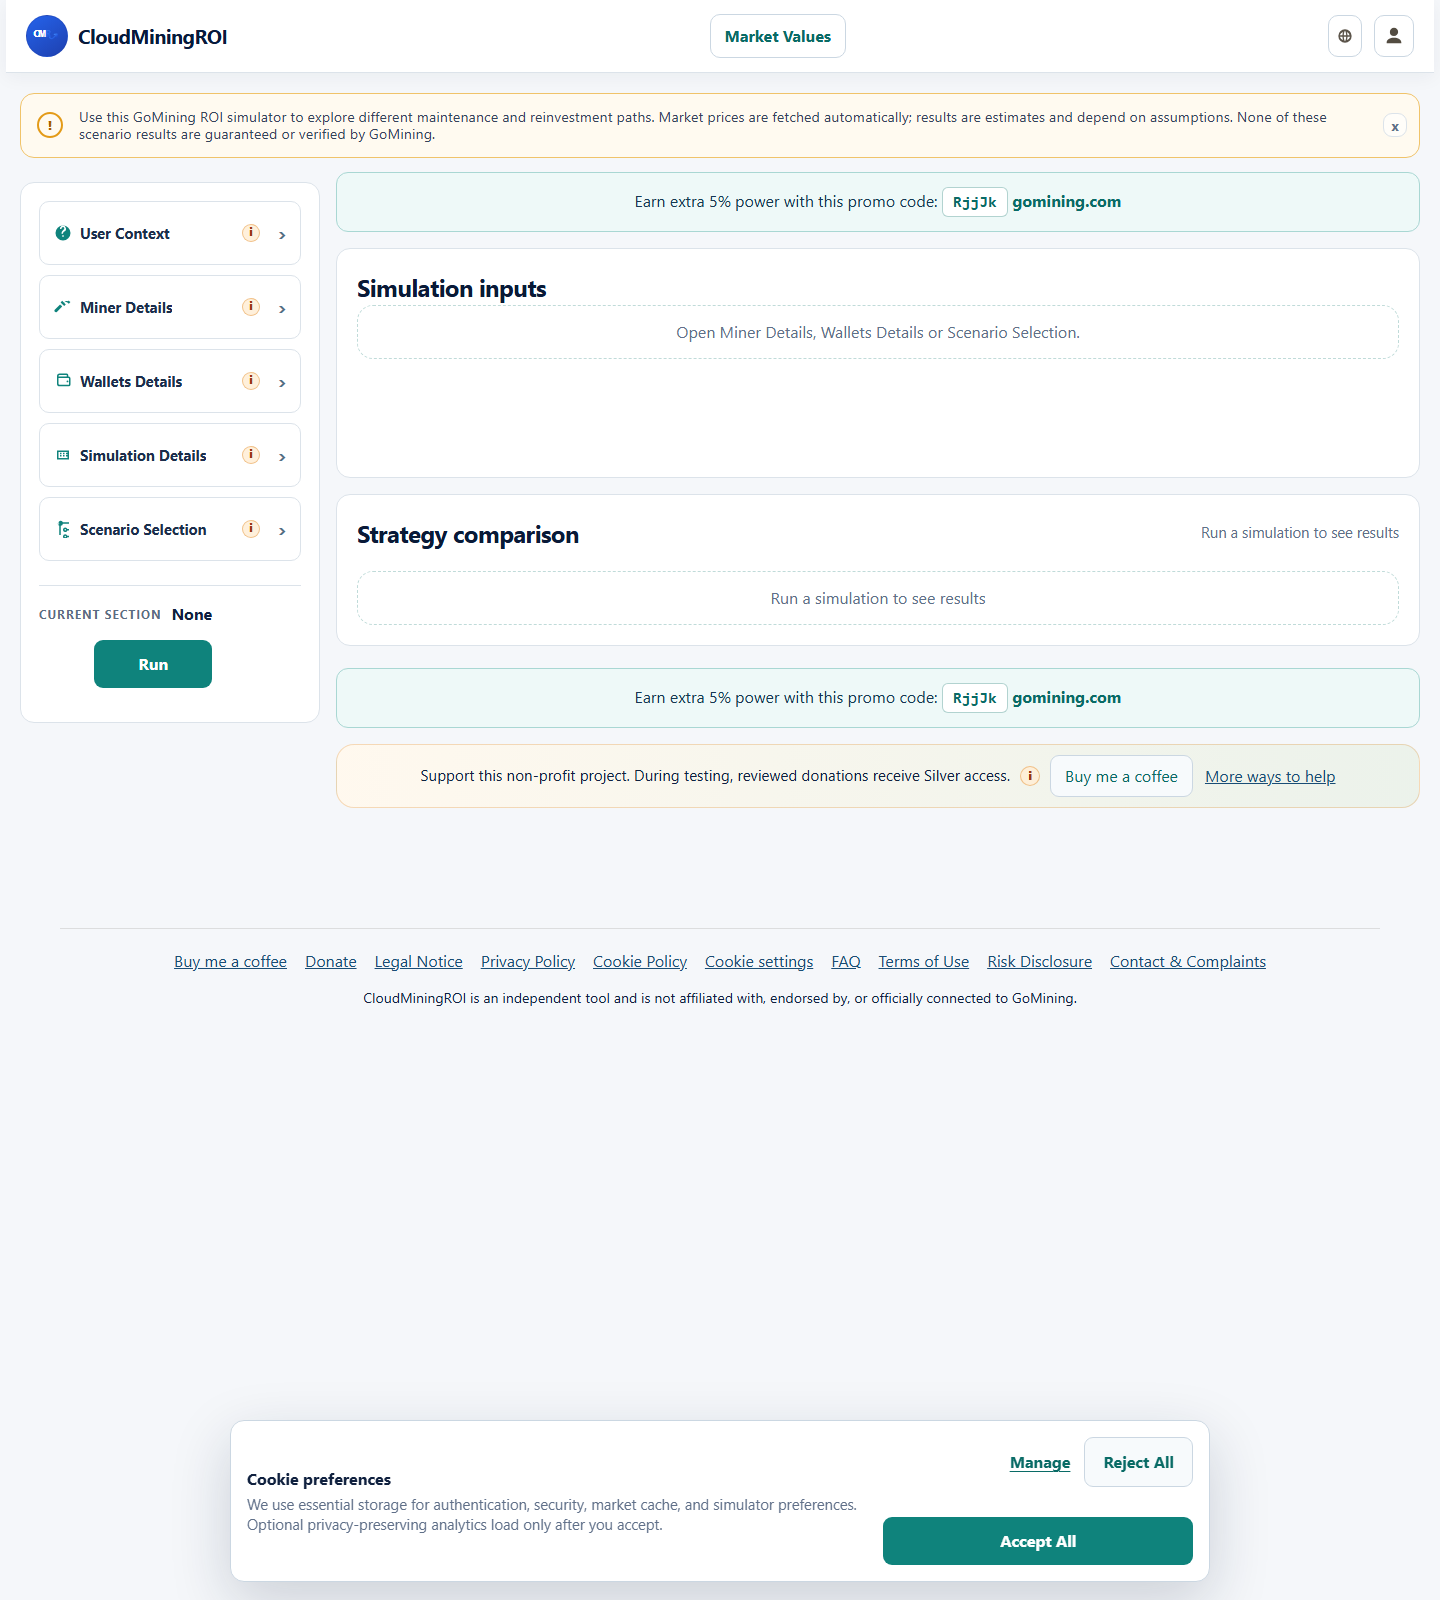
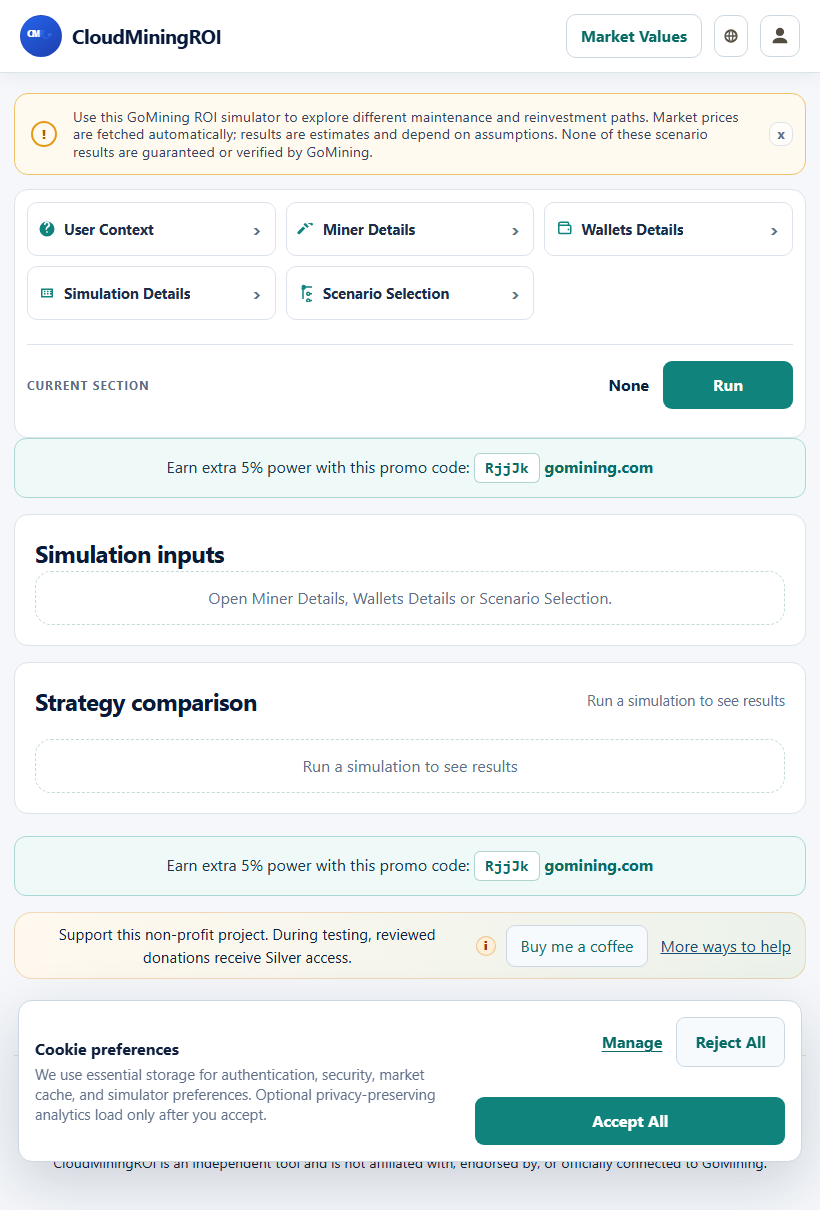
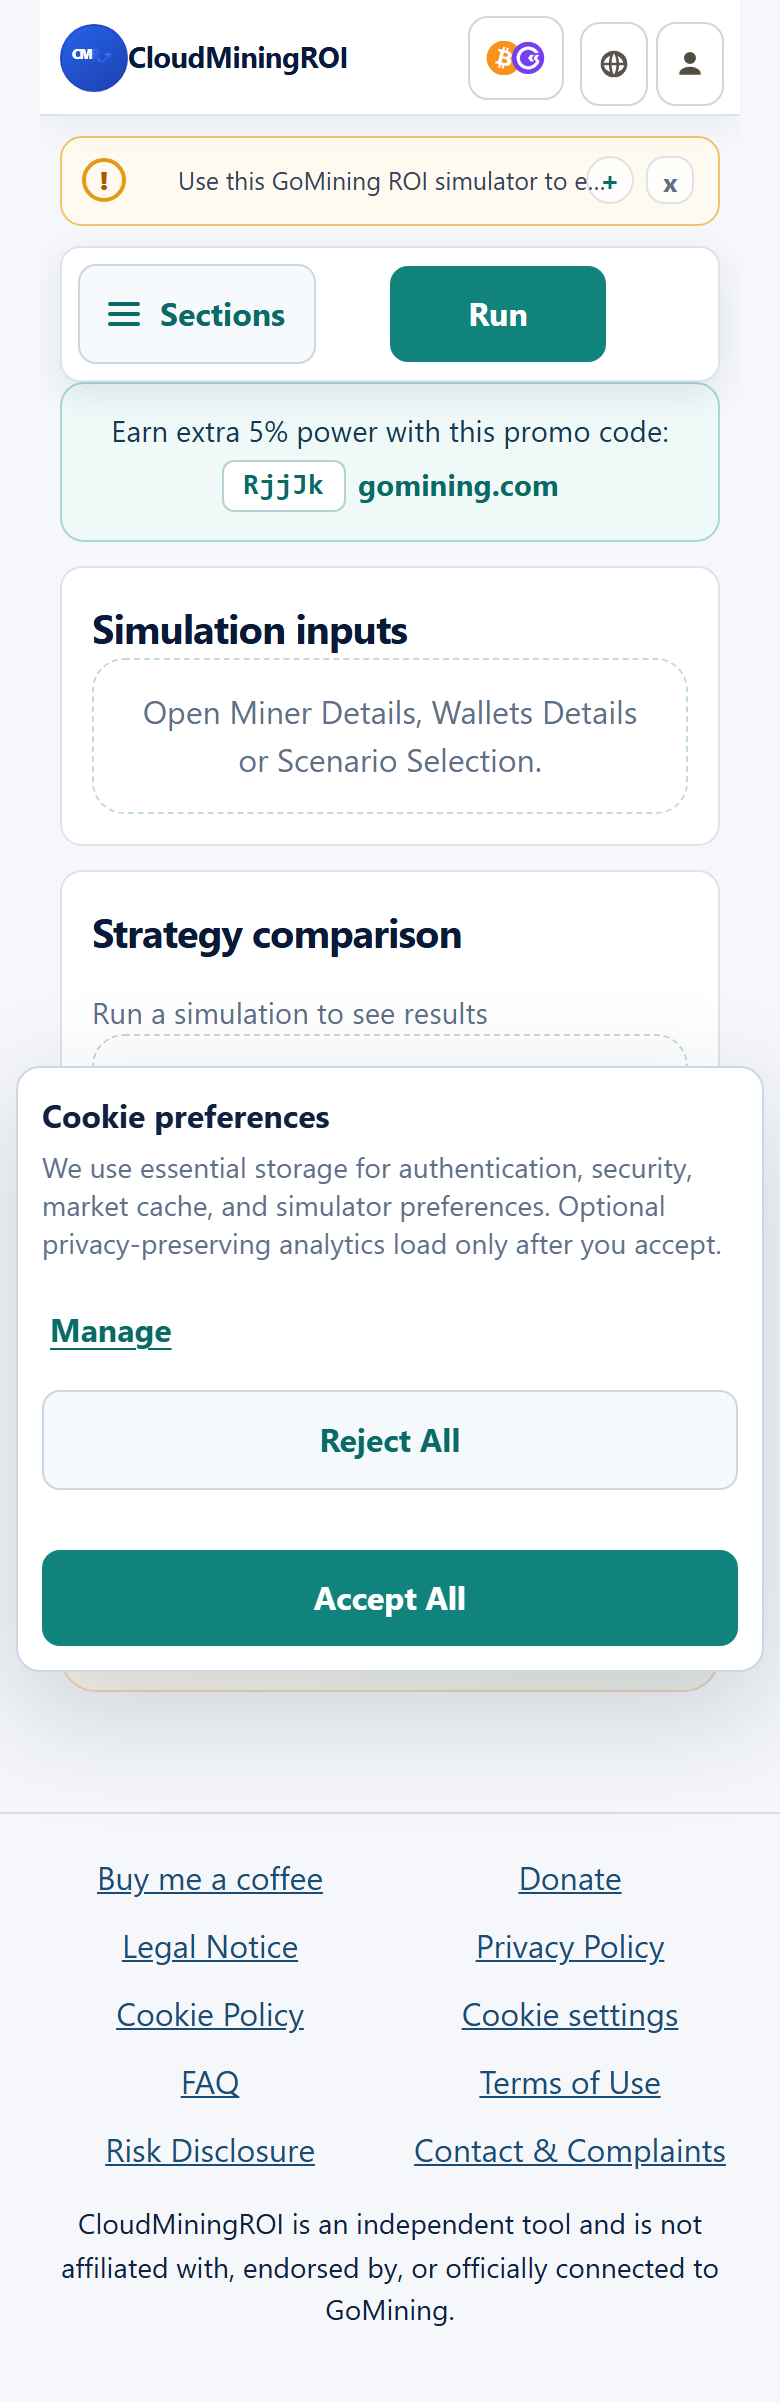
CloudMiningROI opens on the main screen with the top bar, the section drawer, market values, the account menu, and the Run button.
If you are new, start here to see where everything lives.
Where to find it
- Top bar: brand, language, market values, account access, and help.
- Left drawer: the main sections of the simulator.
- Run button: starts the simulation once the inputs are ready.
What you need to fill in
- No special input is required to open the app.
- You only need to choose which section to edit first.
What this part does
- Shows the simulator layout and the main navigation.
- Keeps the most common actions visible so you do not have to hunt for them.
What you should see
- You should be able to open a section, edit values, and return to the main screen easily.
- The app should feel like a guided form instead of a technical dashboard.
Quick steps
- Open the section you want from the left drawer.
- Review the fields in that section.
- Fill in the values you know.
- Press Run when the setup is ready.
2. User Context
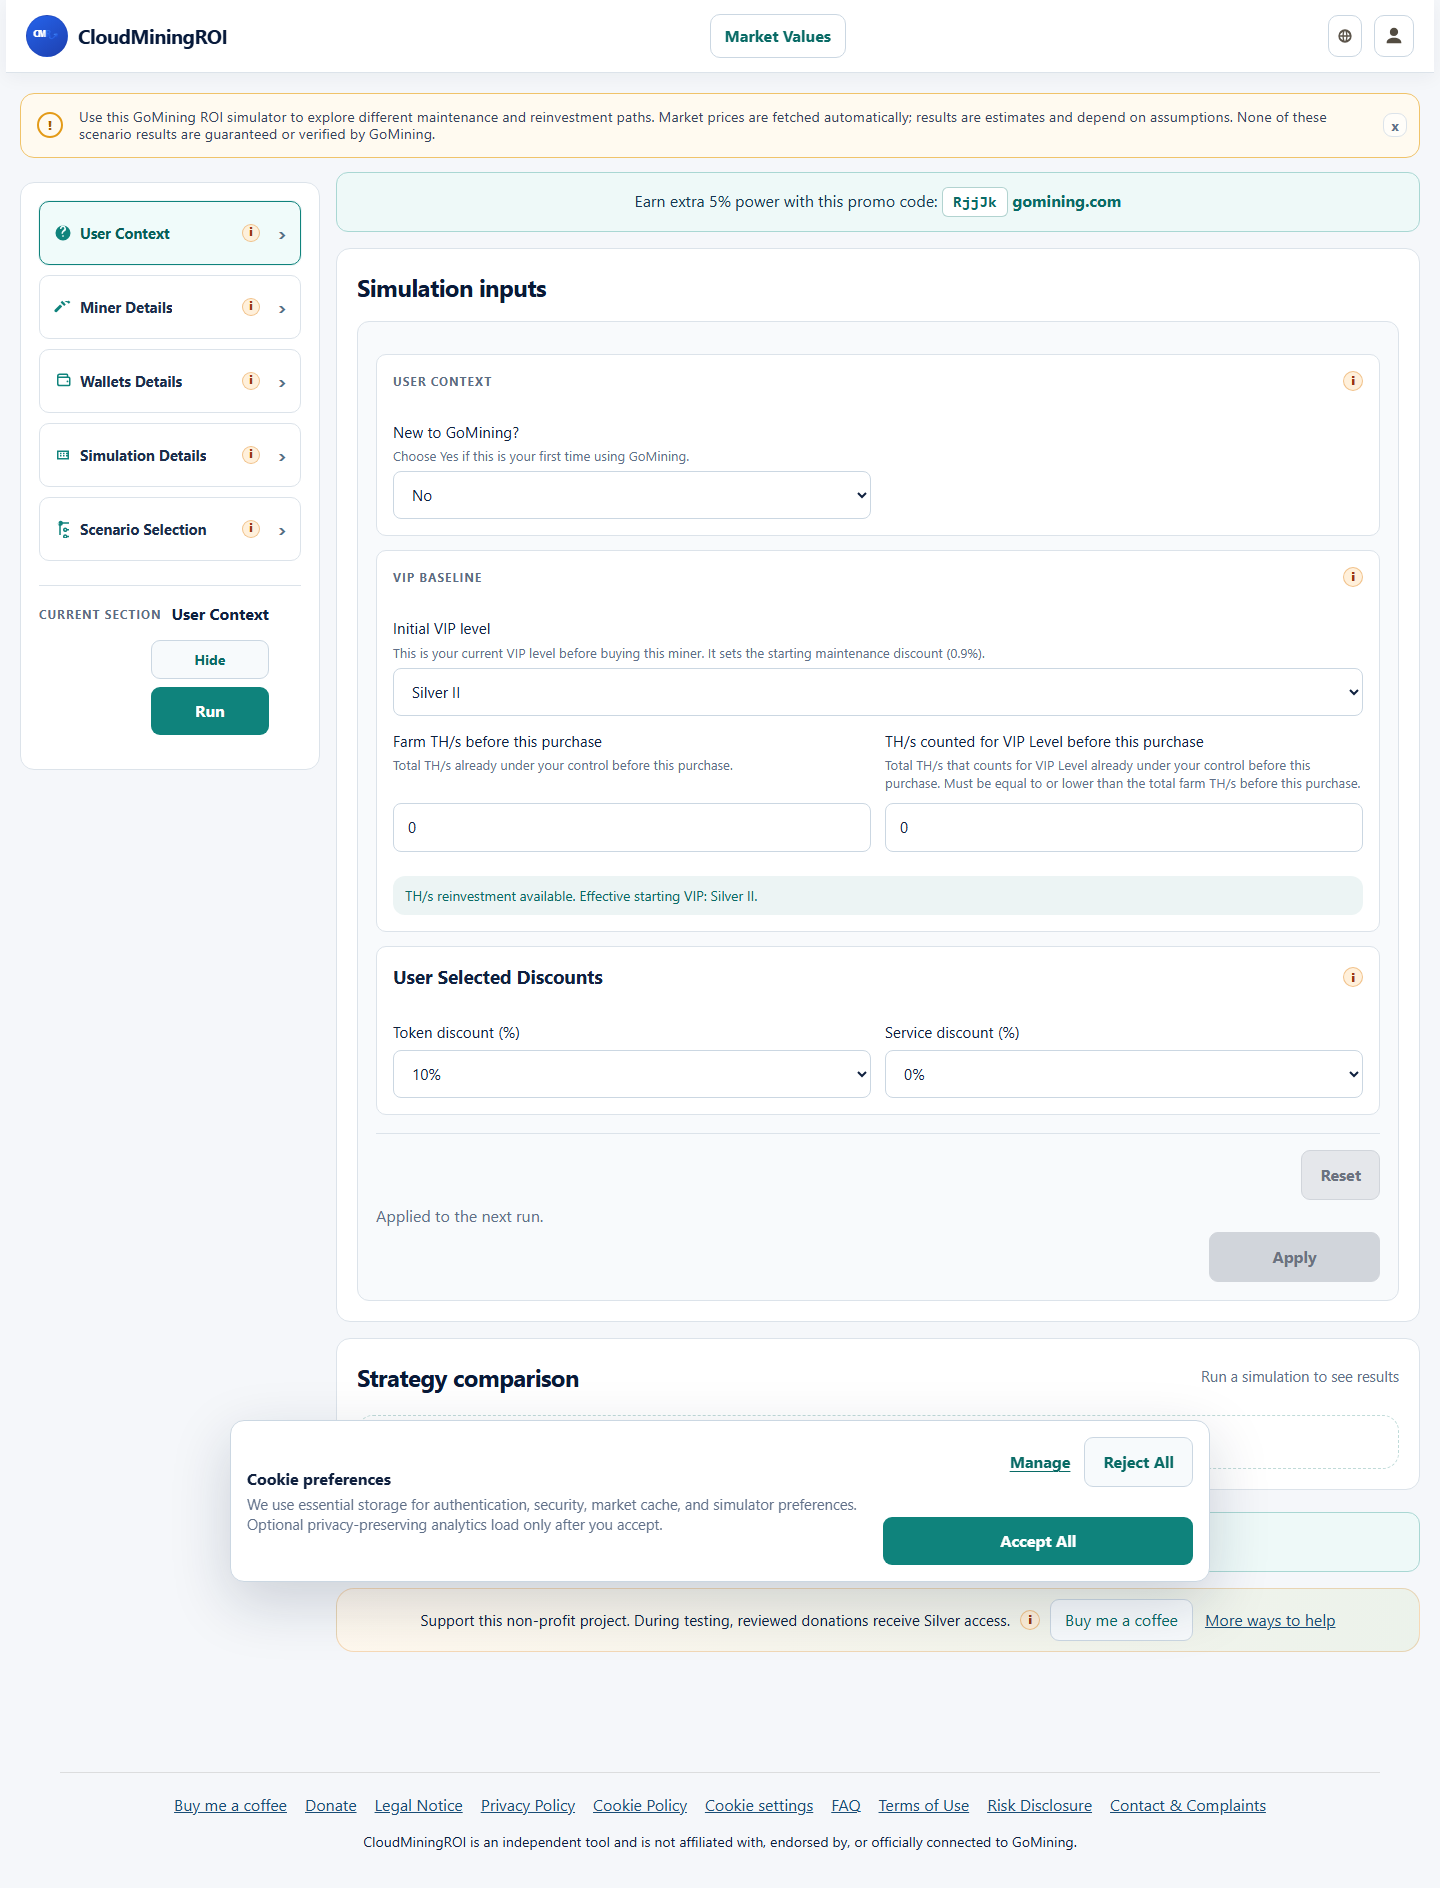
This section sets the starting assumptions for the person who will use the simulator.
It is where you define the initial profile before choosing a miner or wallet setup.
Where to find it
- Open User Context from the left drawer.
- Use it before Miner Details if you want the simulator to start from your real context.
What you need to fill in
- Whether the user is new to the platform.
- The starting VIP baseline.
- Farm TH/s before this purchase.
- TH/s counted for VIP before this purchase.
- User selected discounts.
What this part does
- Sets the user starting point for the simulation.
- Helps the app apply the right VIP and discount behavior.
What you should see
- If you choose a new user profile, the starting values should adapt to that profile.
- If you change the discounts, the simulation should reflect those changes after you apply them.
Quick steps
- Open User Context.
- Choose whether the user is new or experienced.
- Select the starting VIP baseline.
- Enter the farm TH/s values if you want the simulation to match your current situation.
- Choose the discount values you want to use.
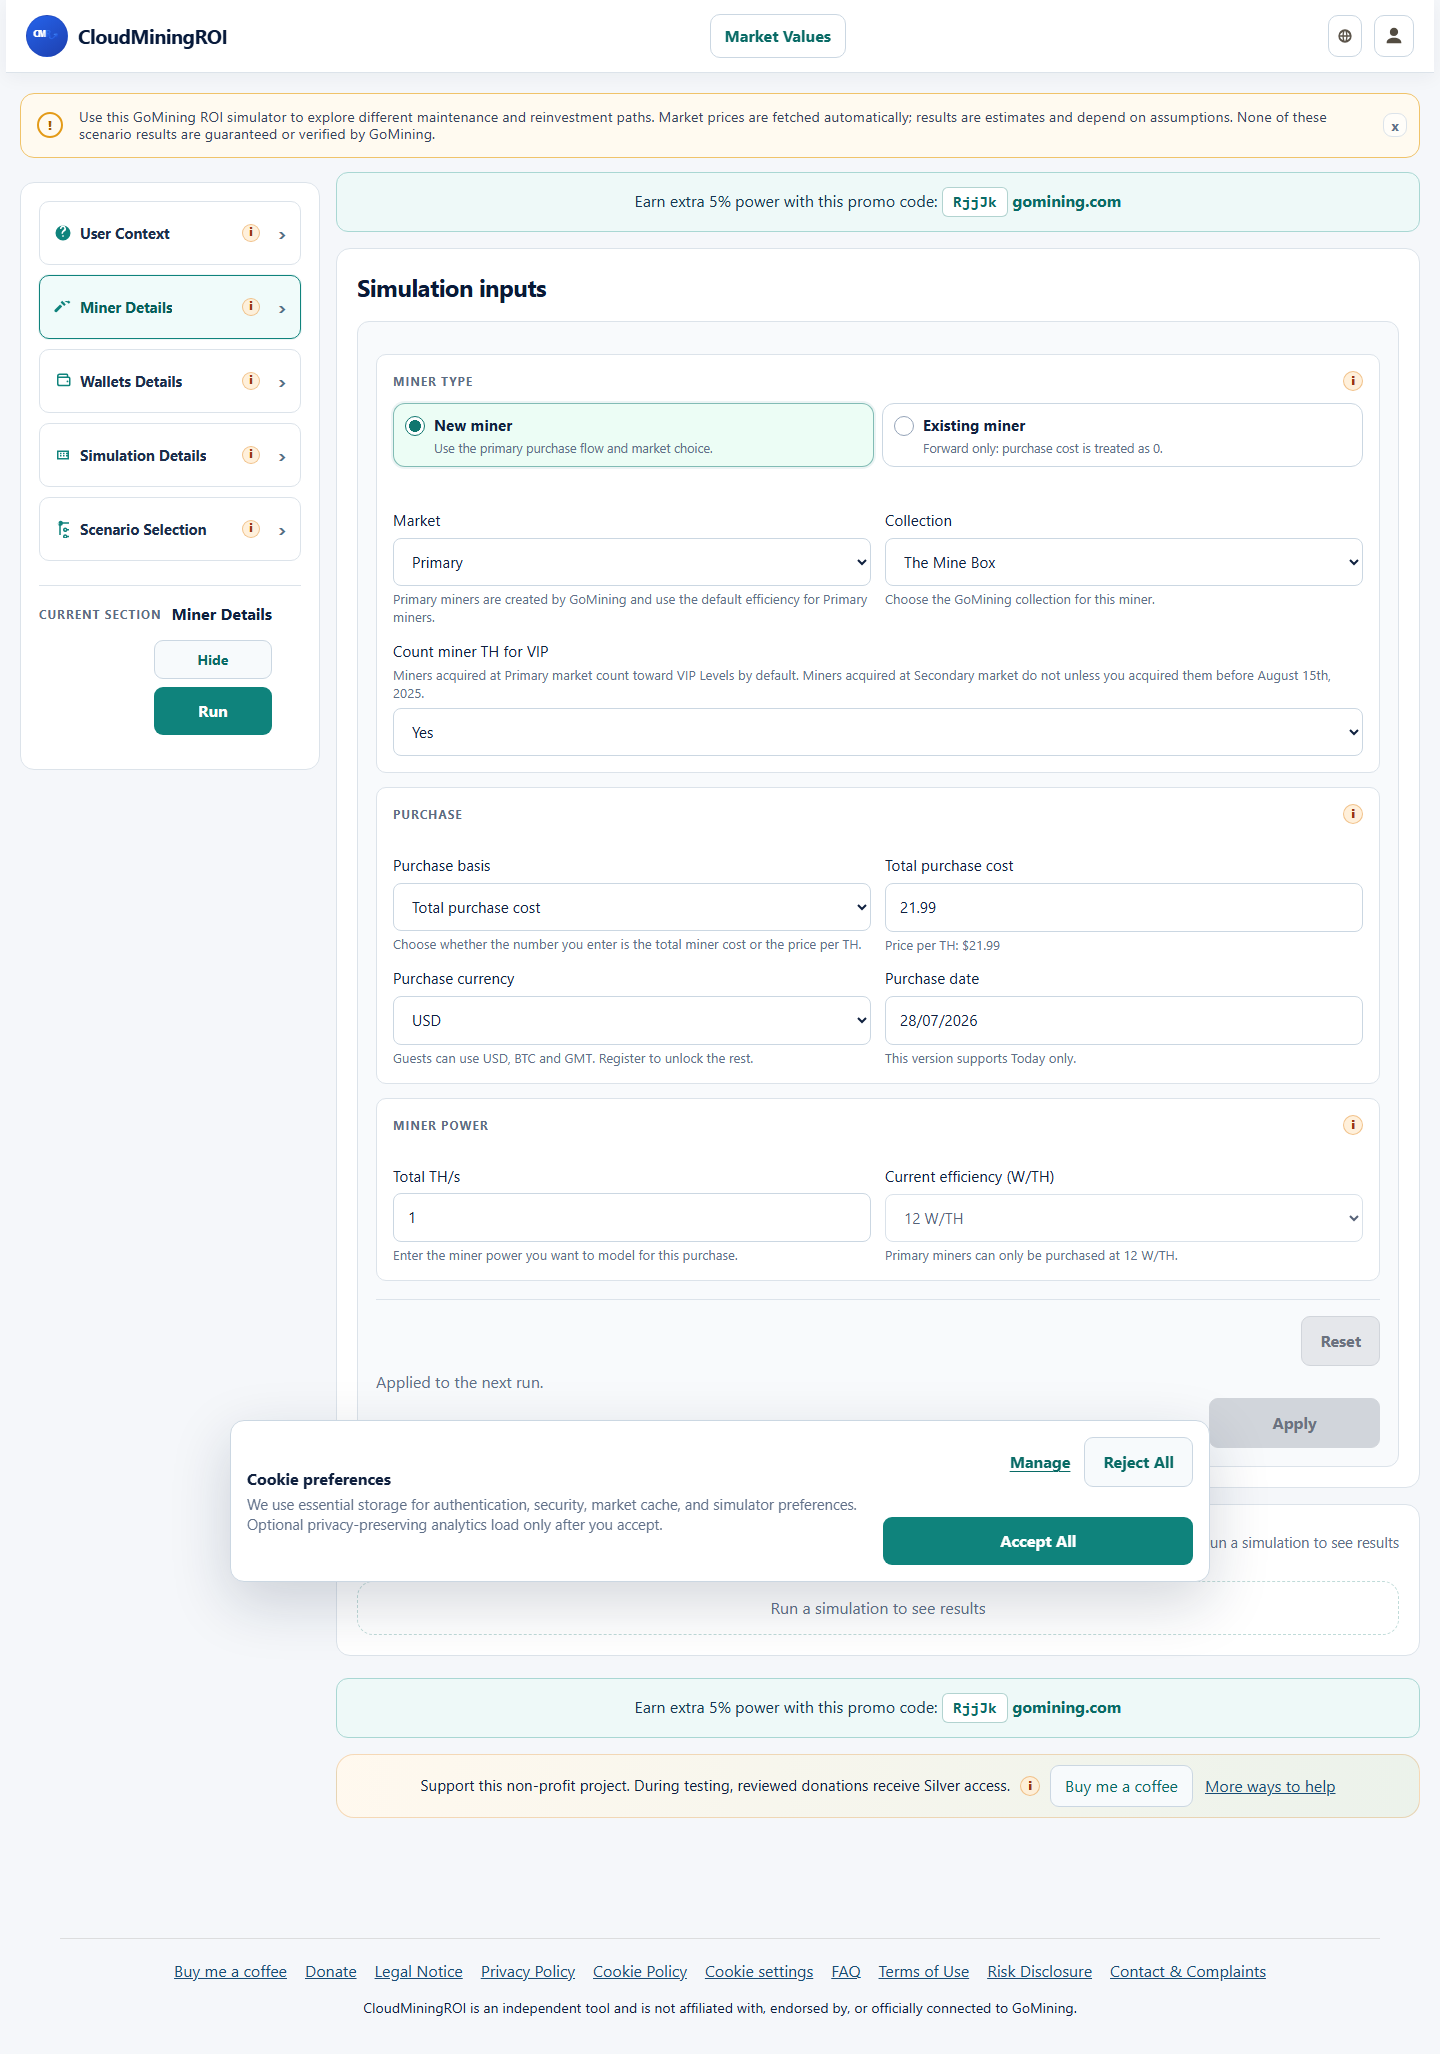
3. Miner setup
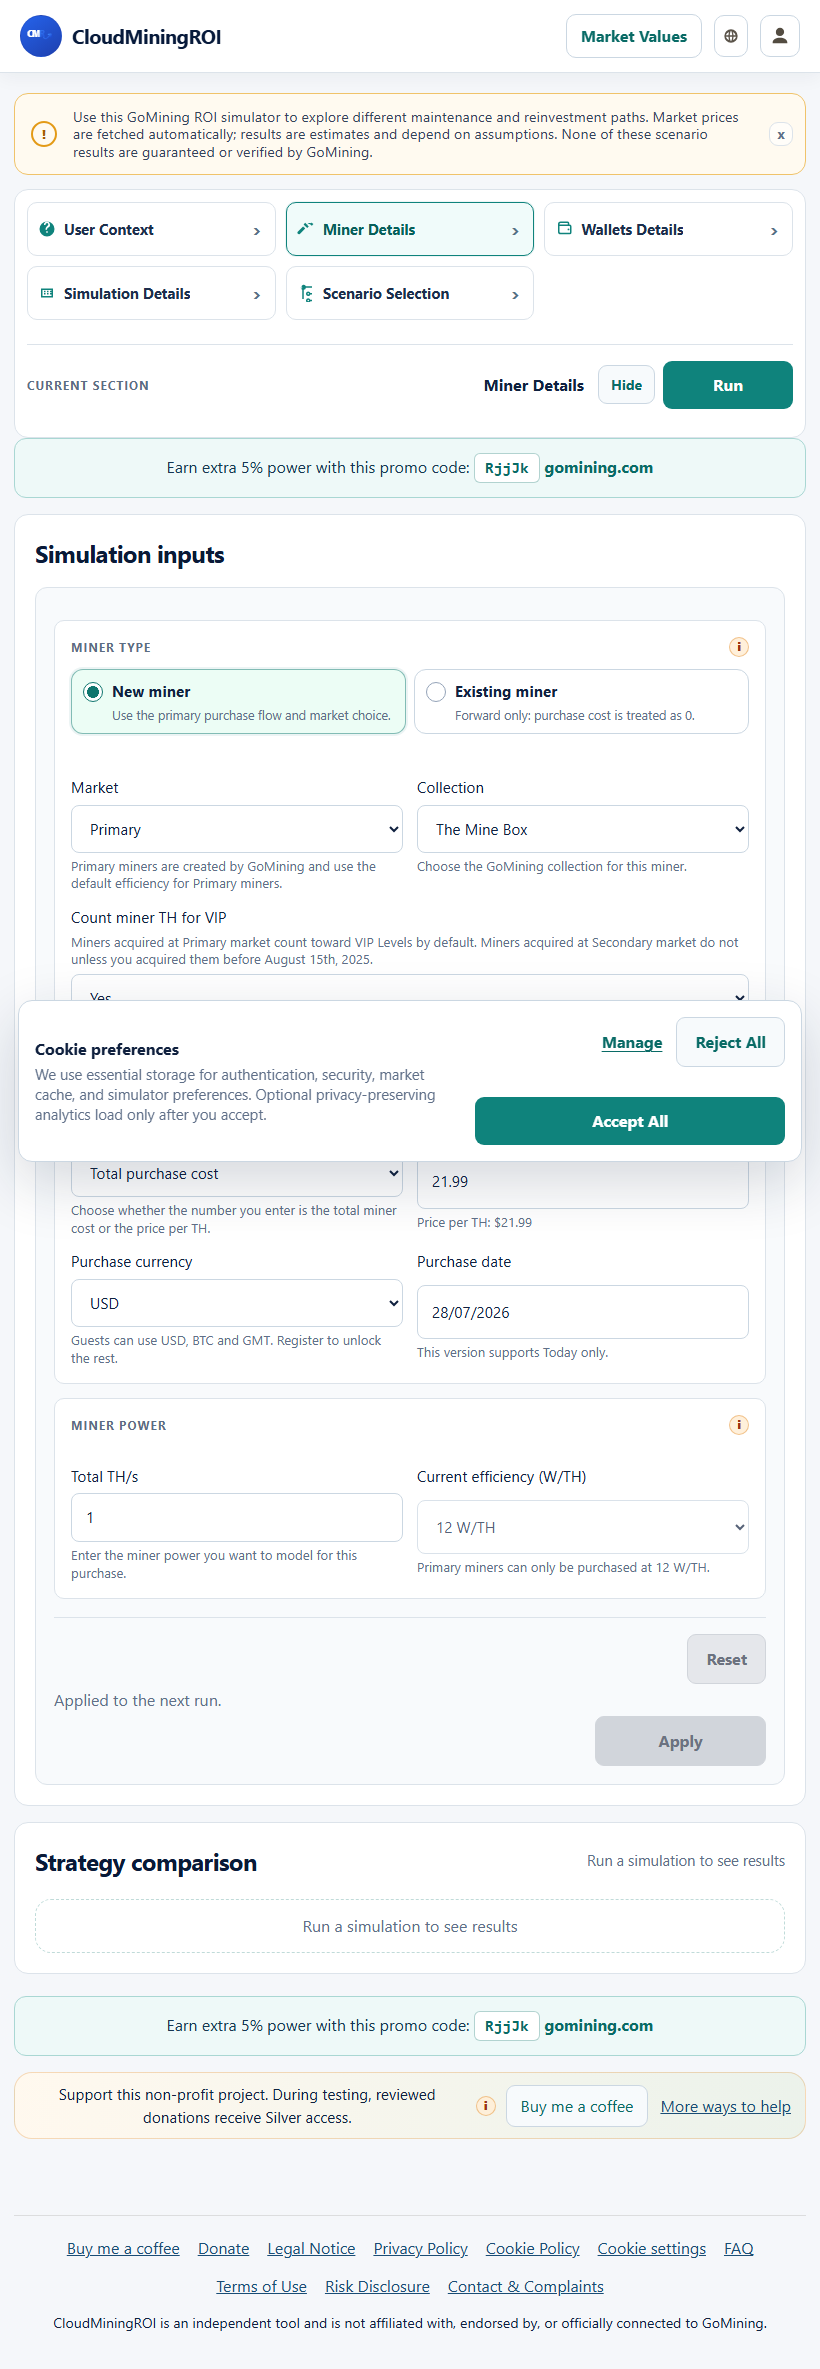
This is where you describe the miner you want to simulate.
The simulator uses these values to estimate how the miner behaves over time.
Where to find it
- Open Miner Details from the left drawer.
- The main inputs are grouped together so you can read them in one place.
What you need to fill in
- New miner or existing miner.
- Market: Primary or Secondary.
- Collection.
- Miner power in TH/s.
- Current efficiency in W/TH.
- Purchase basis, currency, and date.
What this part does
- Defines the miner that the simulation will use.
- Controls which upgrade options stay visible.
- Keeps the selected collection attached to the miner.
What you should see
- Primary purchases should keep the default miner behavior simple.
- Secondary purchases should allow more flexible upgrade settings.
- The collection you choose should stay linked to the miner.
Quick steps
- Choose whether the miner is new or existing.
- Pick the market that matches the purchase.
- Select the collection.
- Enter the miner power and the current efficiency.
- Choose the purchase basis, currency, and date.
4. Upgrade options
CloudMiningROI can model two kinds of miner upgrades: power upgrades and efficiency upgrades.
These are helpful if you want to compare the base miner with an improved version.
Where to find it
- Look below the purchase inputs inside Miner Details.
- The upgrade cards appear or stay hidden depending on the miner setup you picked.
What you need to fill in
- Power upgrade target in TH/s.
- Power upgrade cost in the selected purchase currency.
- Efficiency upgrade target in W/TH.
What this part does
- Power Upgrade estimates the miner after a TH/s increase.
- Efficiency Upgrade estimates the miner after better W/TH efficiency.
- The current efficiency can stay available in the target list so you can keep the setup unchanged if you want.
What you should see
- If you set a valid target, the upgrade result should appear in the simulation.
- If you keep the current efficiency, the app should not force you into a fake improvement.
- If you are on a Primary new-miner flow, the upgrade cards may stay hidden.
Quick steps
- Enter the target power if you want to model more TH/s.
- Add the upgrade cost if you know it.
- Choose the efficiency target you want to test.
- Run the simulation to compare the result against the base miner.
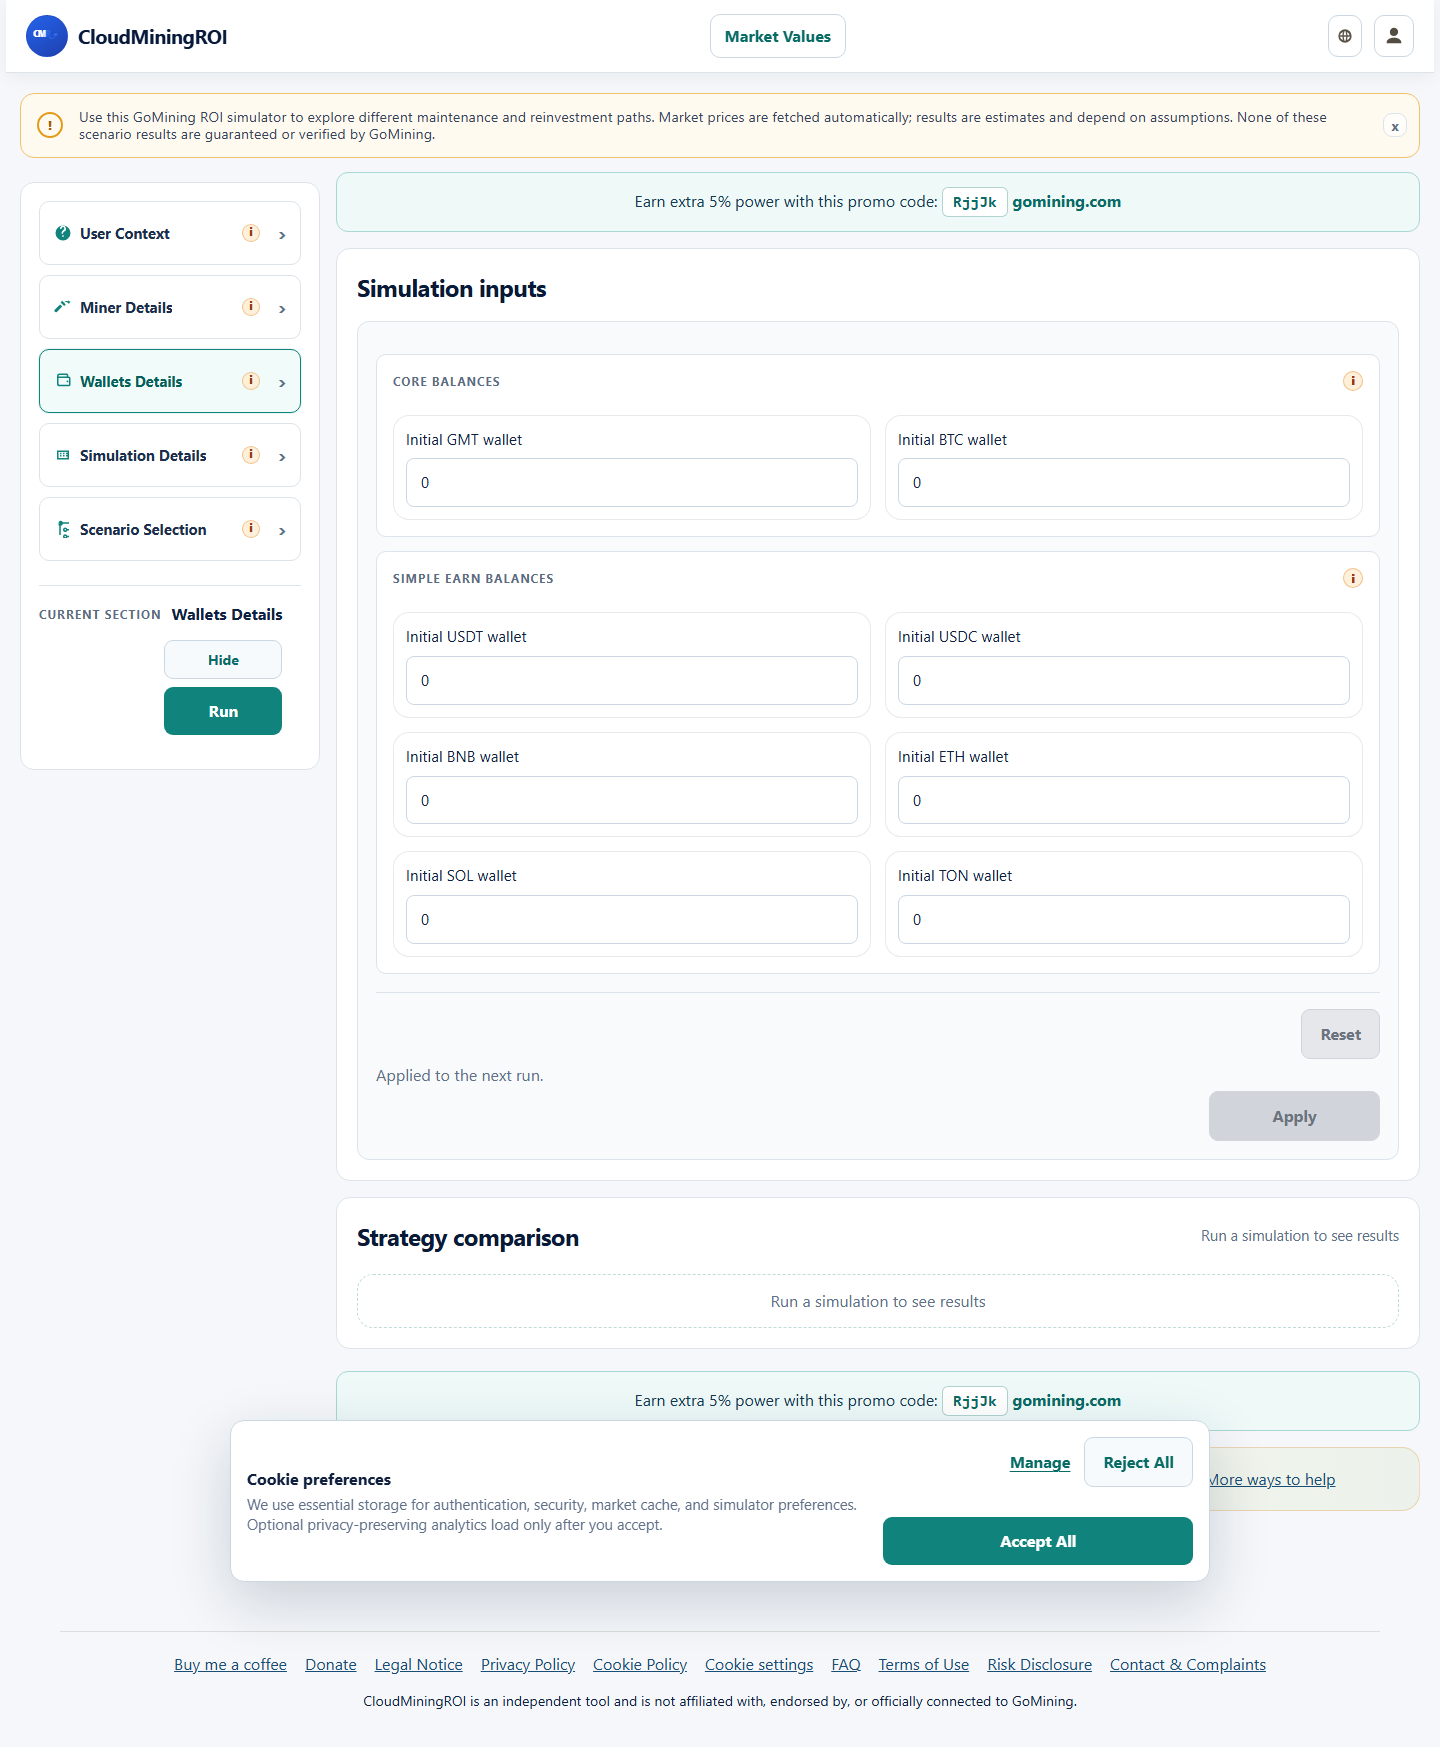
5. Wallet balances
This section is for the balances that already exist before the simulation starts.
Use it to tell the simulator what you already hold.
Where to find it
- Open Wallets Details from the left drawer.
- Use the wallet section when you want to add your starting balances.
What you need to fill in
- BTC balance.
- GMT balance.
- Supported extra balances when they are enabled in the app.
- Simple Earn balances when available.
What this part does
- Feeds the starting wallet values into the simulation.
- Lets the app estimate how the balances evolve during the run.
What you should see
- The result should reflect the balances you entered.
- If you change a wallet value and run again, the outcome should update.
Quick steps
- Open Wallets Details.
- Enter the balances you already have.
- Check that the values look right before you run the simulation.
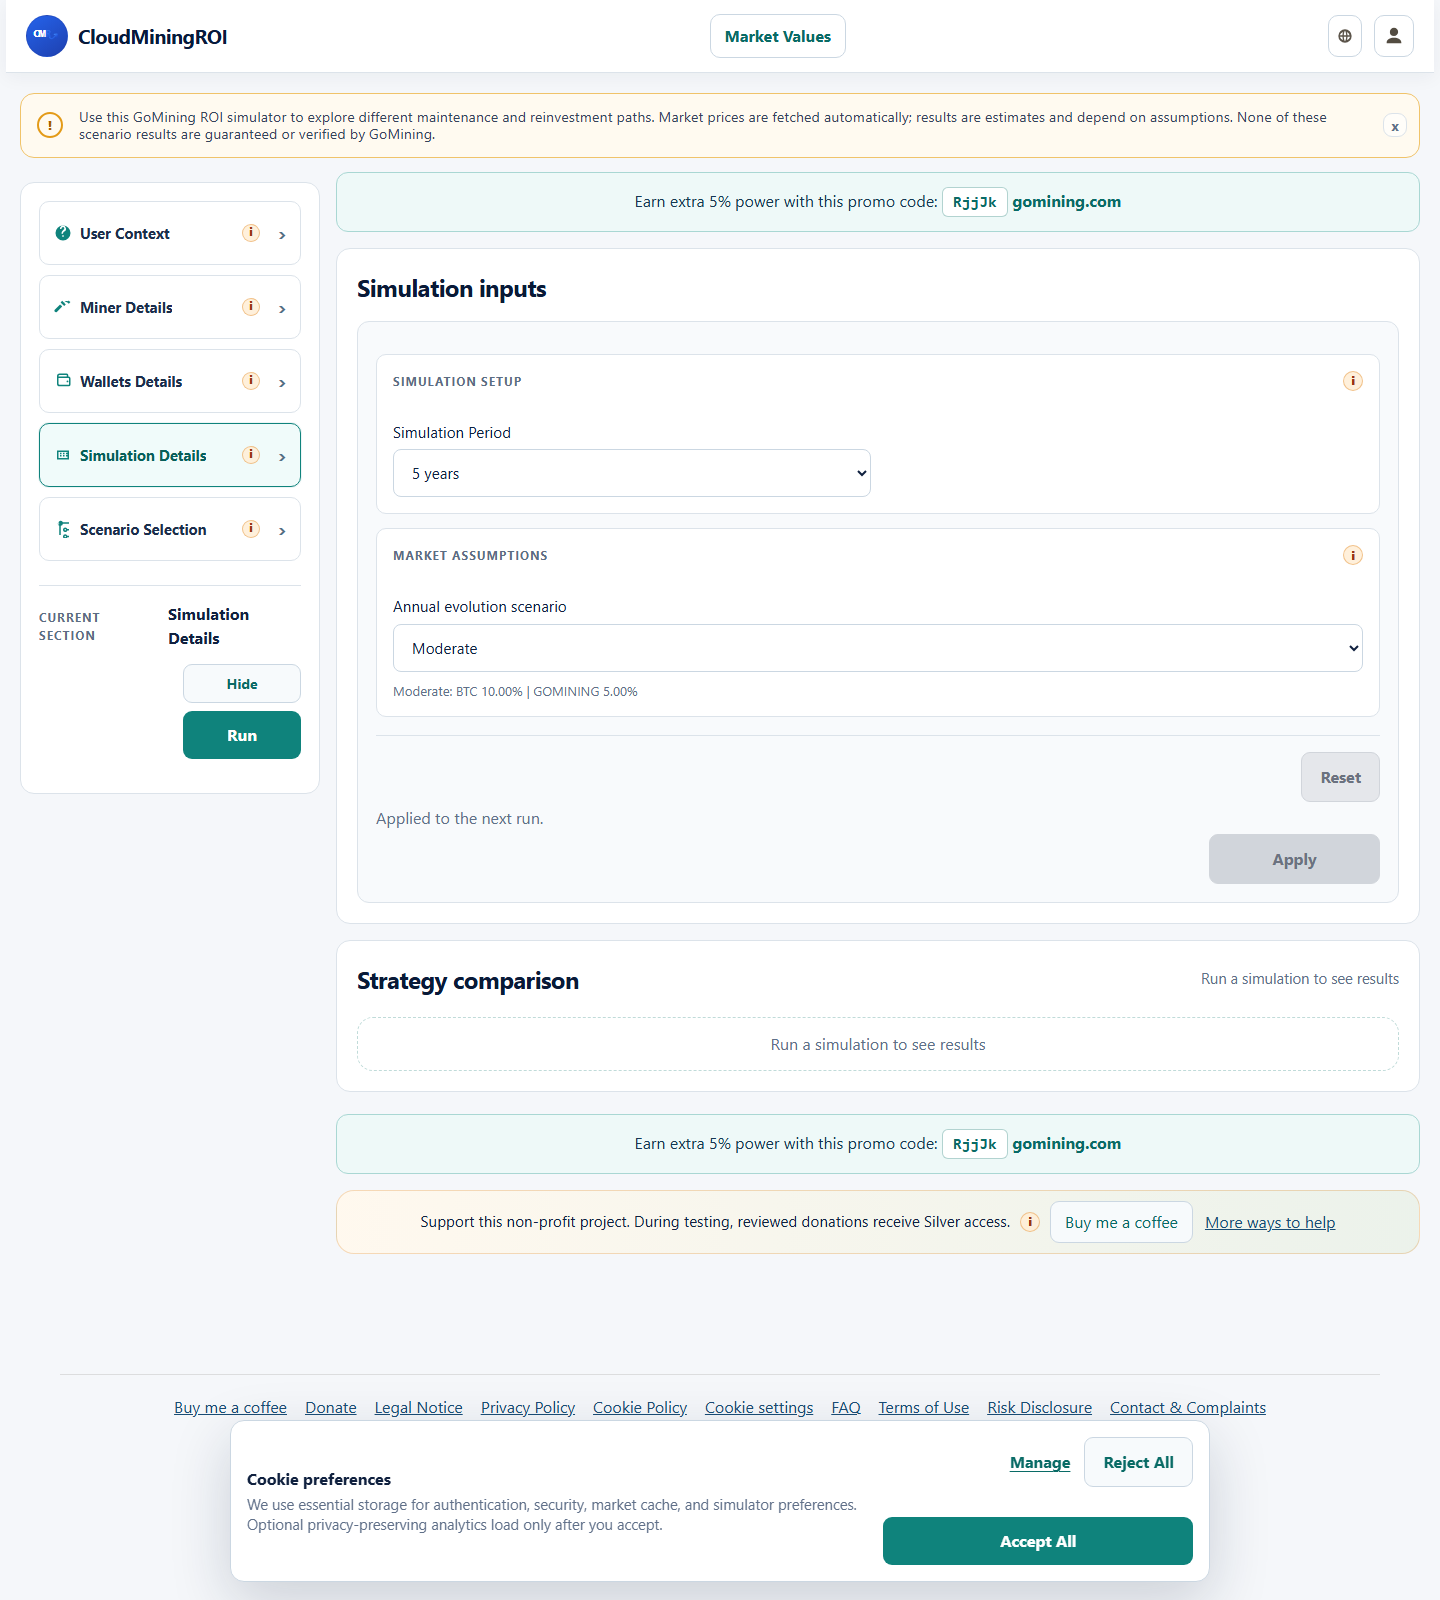
6. Simulation Details
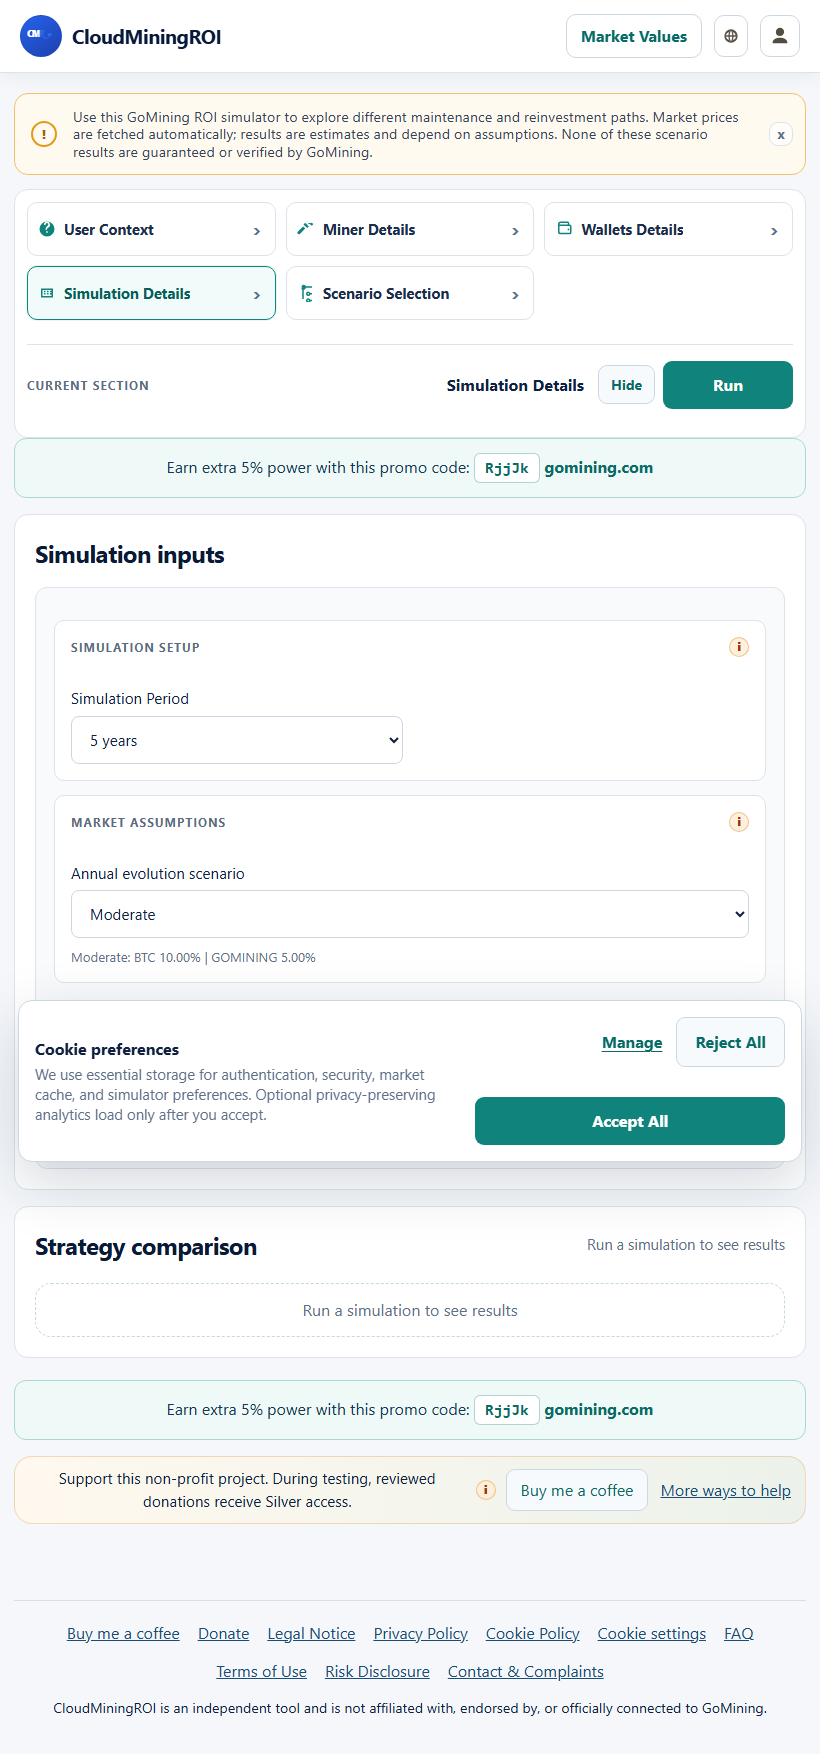
This section controls the market and time assumptions used by the simulator.
It is useful when you want to test different market outlooks.
Where to find it
- Open Simulation Details from the left drawer.
- Use the market assumption controls before you run the simulation.
What you need to fill in
- Simulation period.
- Market evolution scenario.
- BTC annual evolution.
- GMT annual evolution.
What this part does
- Defines the assumptions used to estimate the future result.
- Lets you test a built-in market scenario or custom values when available.
What you should see
- If custom values are available, BTC and GMT should appear together so you can edit them quickly.
- The simulation should use the market assumptions you selected when you run it.
Quick steps
- Open Simulation Details.
- Choose the period you want to test.
- Pick the market scenario.
- Enter custom BTC and GMT evolution values if the app allows them.
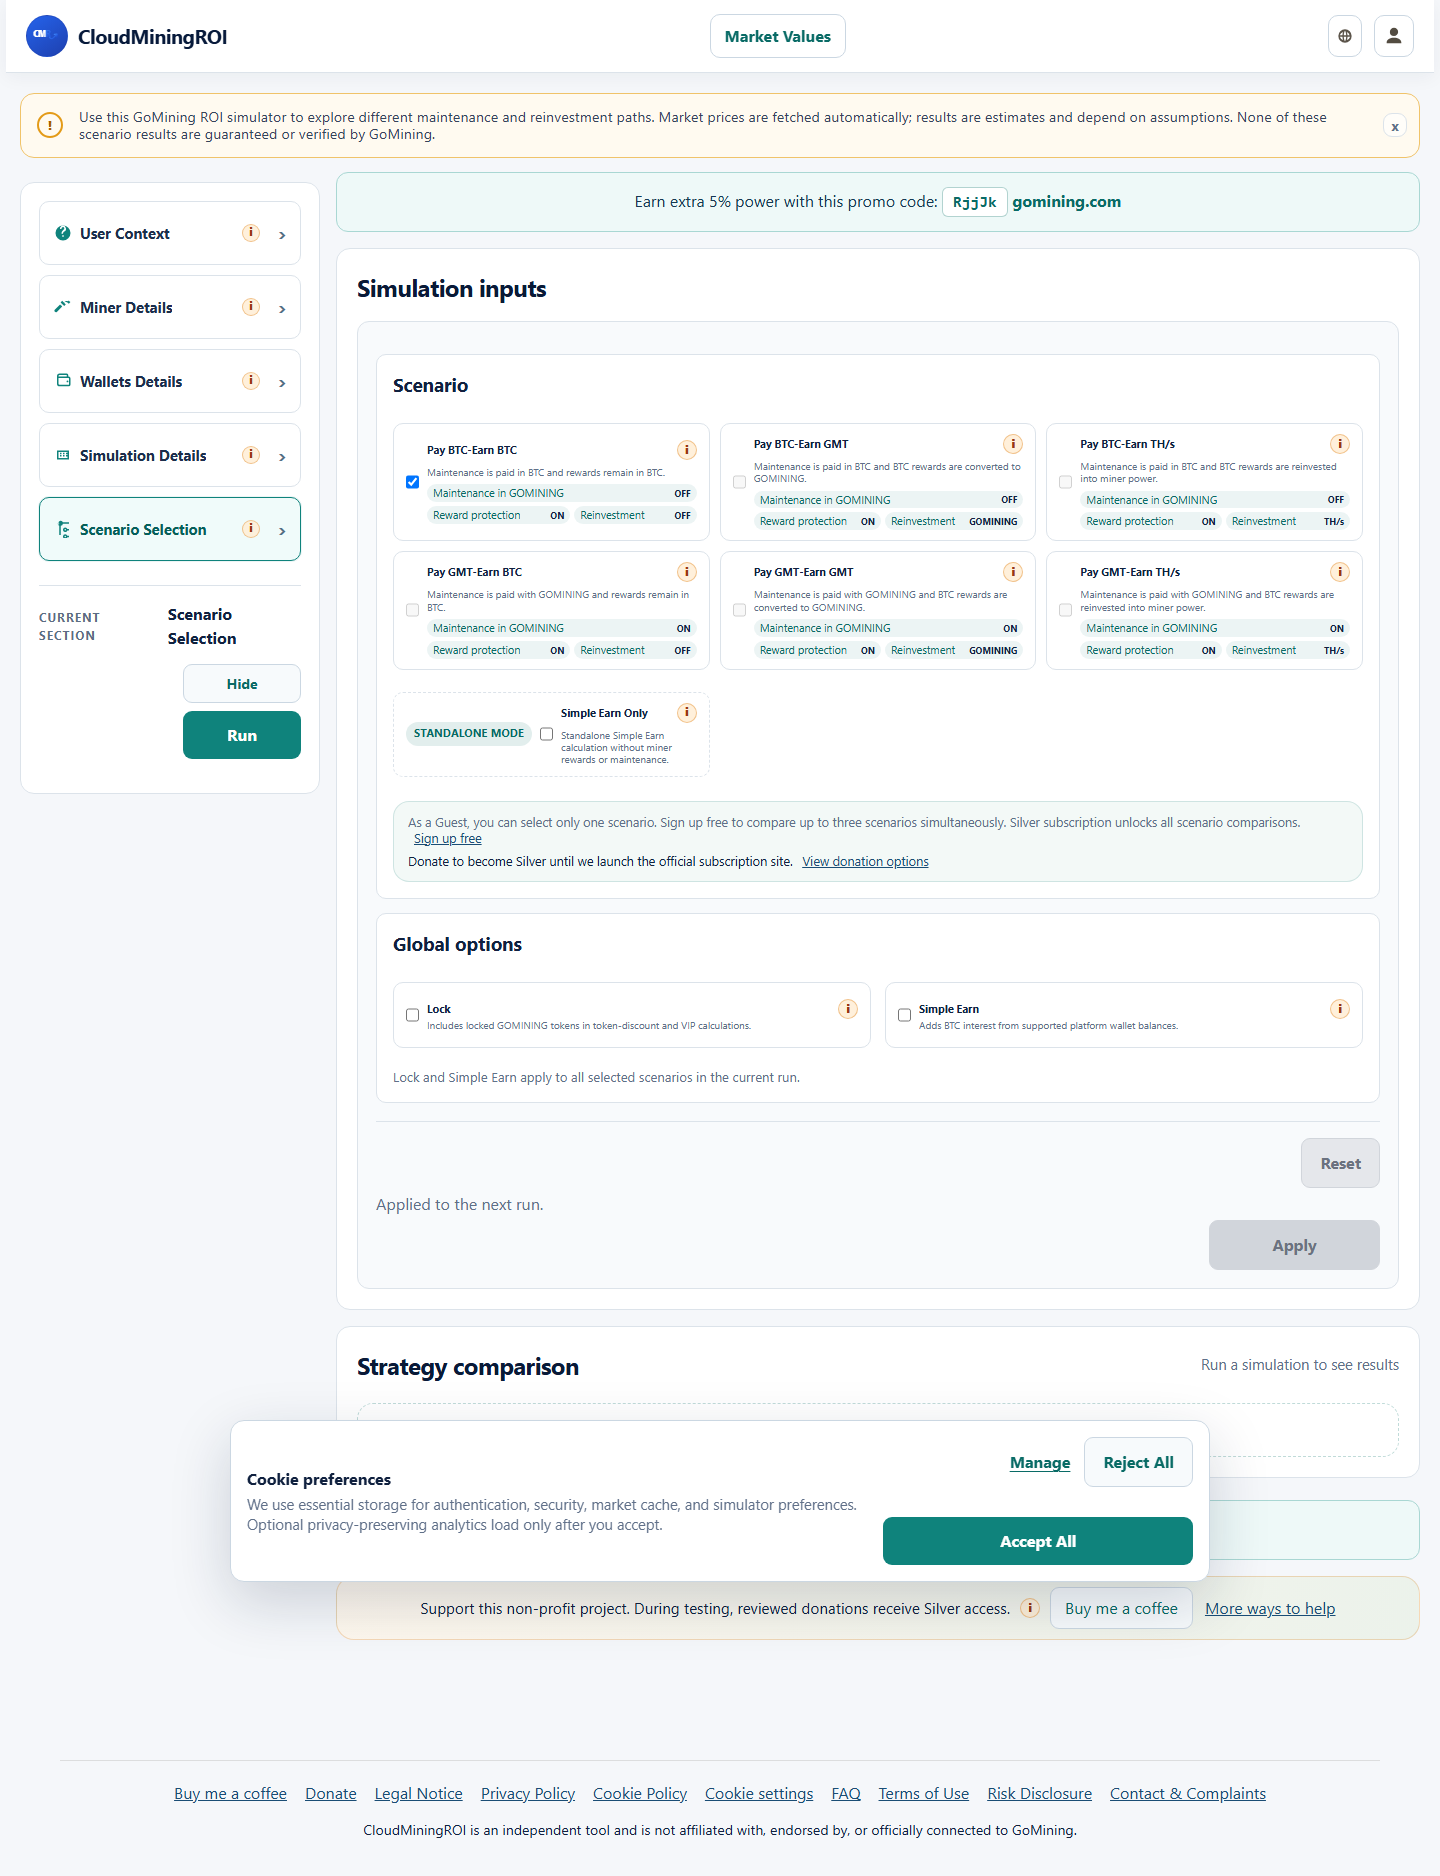
7. Scenario Selection
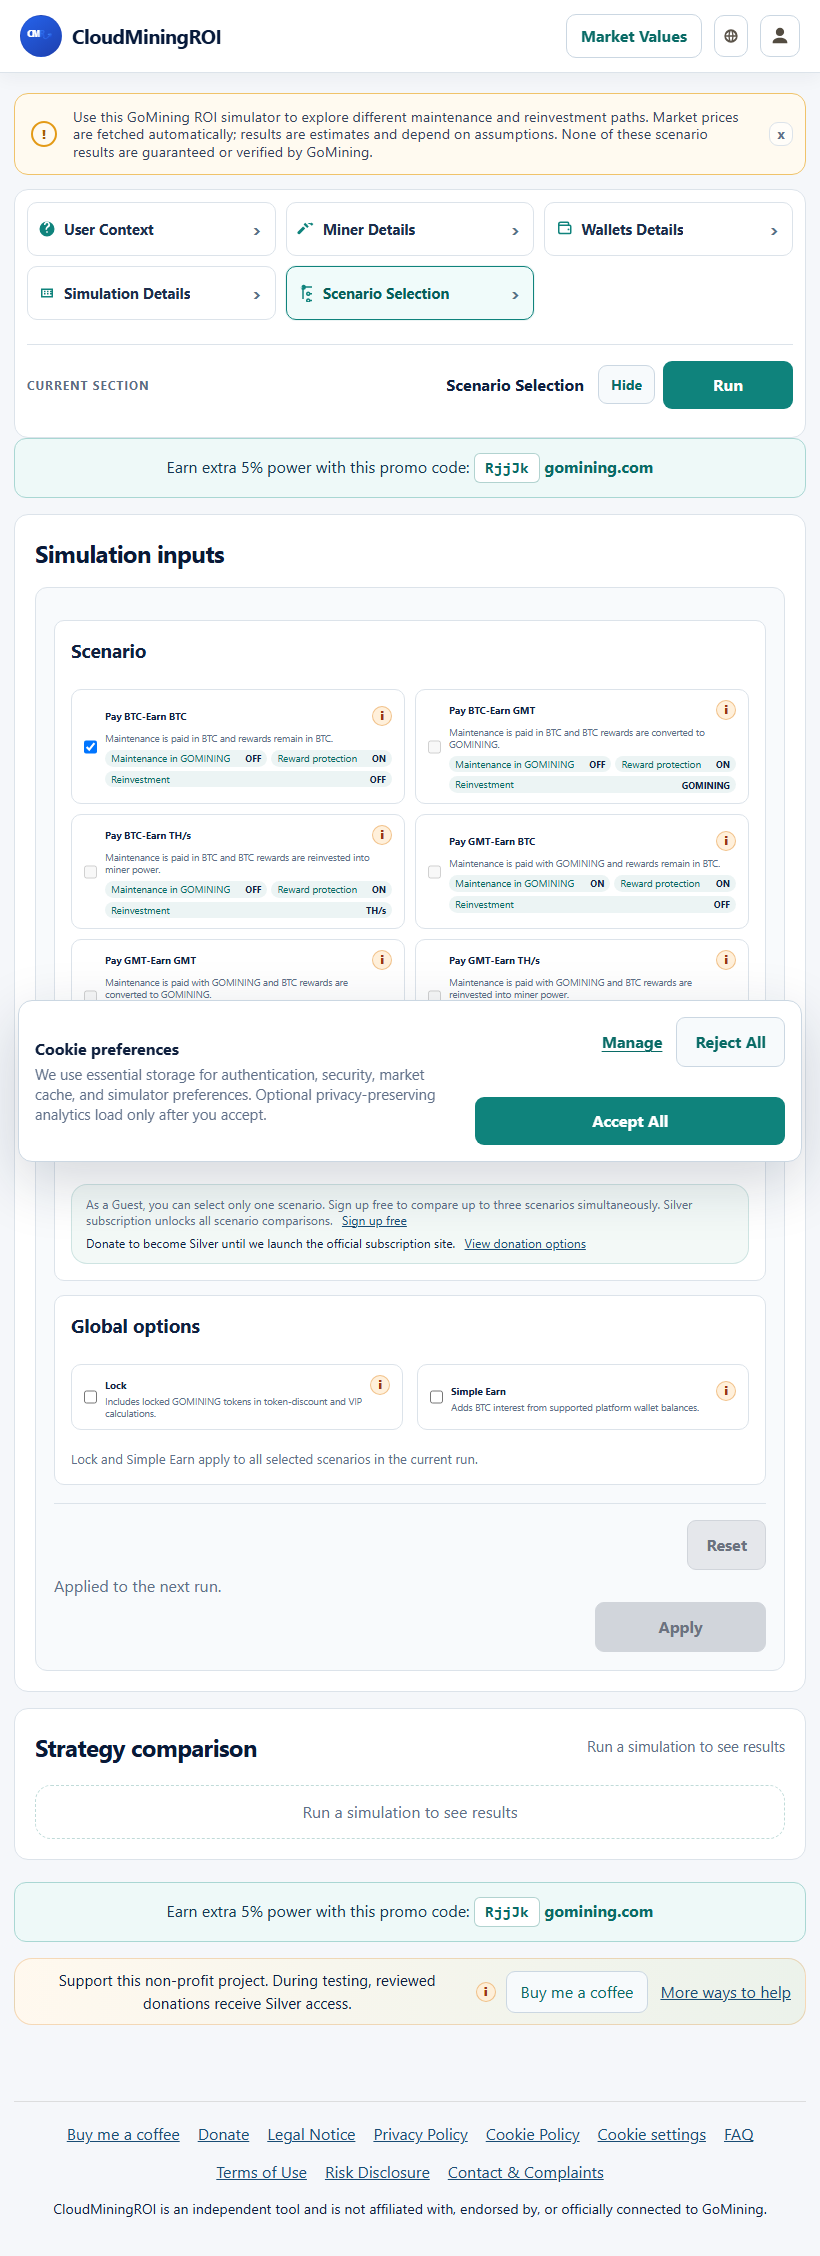
This section is where you choose what the simulation should compare.
It helps you see how different paths behave using the same miner and wallet setup.
Where to find it
- Open Scenario Selection from the left drawer.
- Use it after you finish miner, wallet, and market inputs.
What you need to fill in
- The scenario or scenarios you want to compare.
- Simple Earn on or off.
- Lock GMT on or off.
What this part does
- Builds the comparison paths used in the result chart.
- Lets you test earning and reinvestment combinations side by side.
What you should see
- The chart and comparison summary should update after you run the simulation.
- You should be able to see which scenario performs best.
Quick steps
- Open Scenario Selection.
- Choose the scenarios you want to compare.
- Enable or disable Simple Earn and Lock GMT as needed.
- Run the simulation and review the comparison.
8. Results
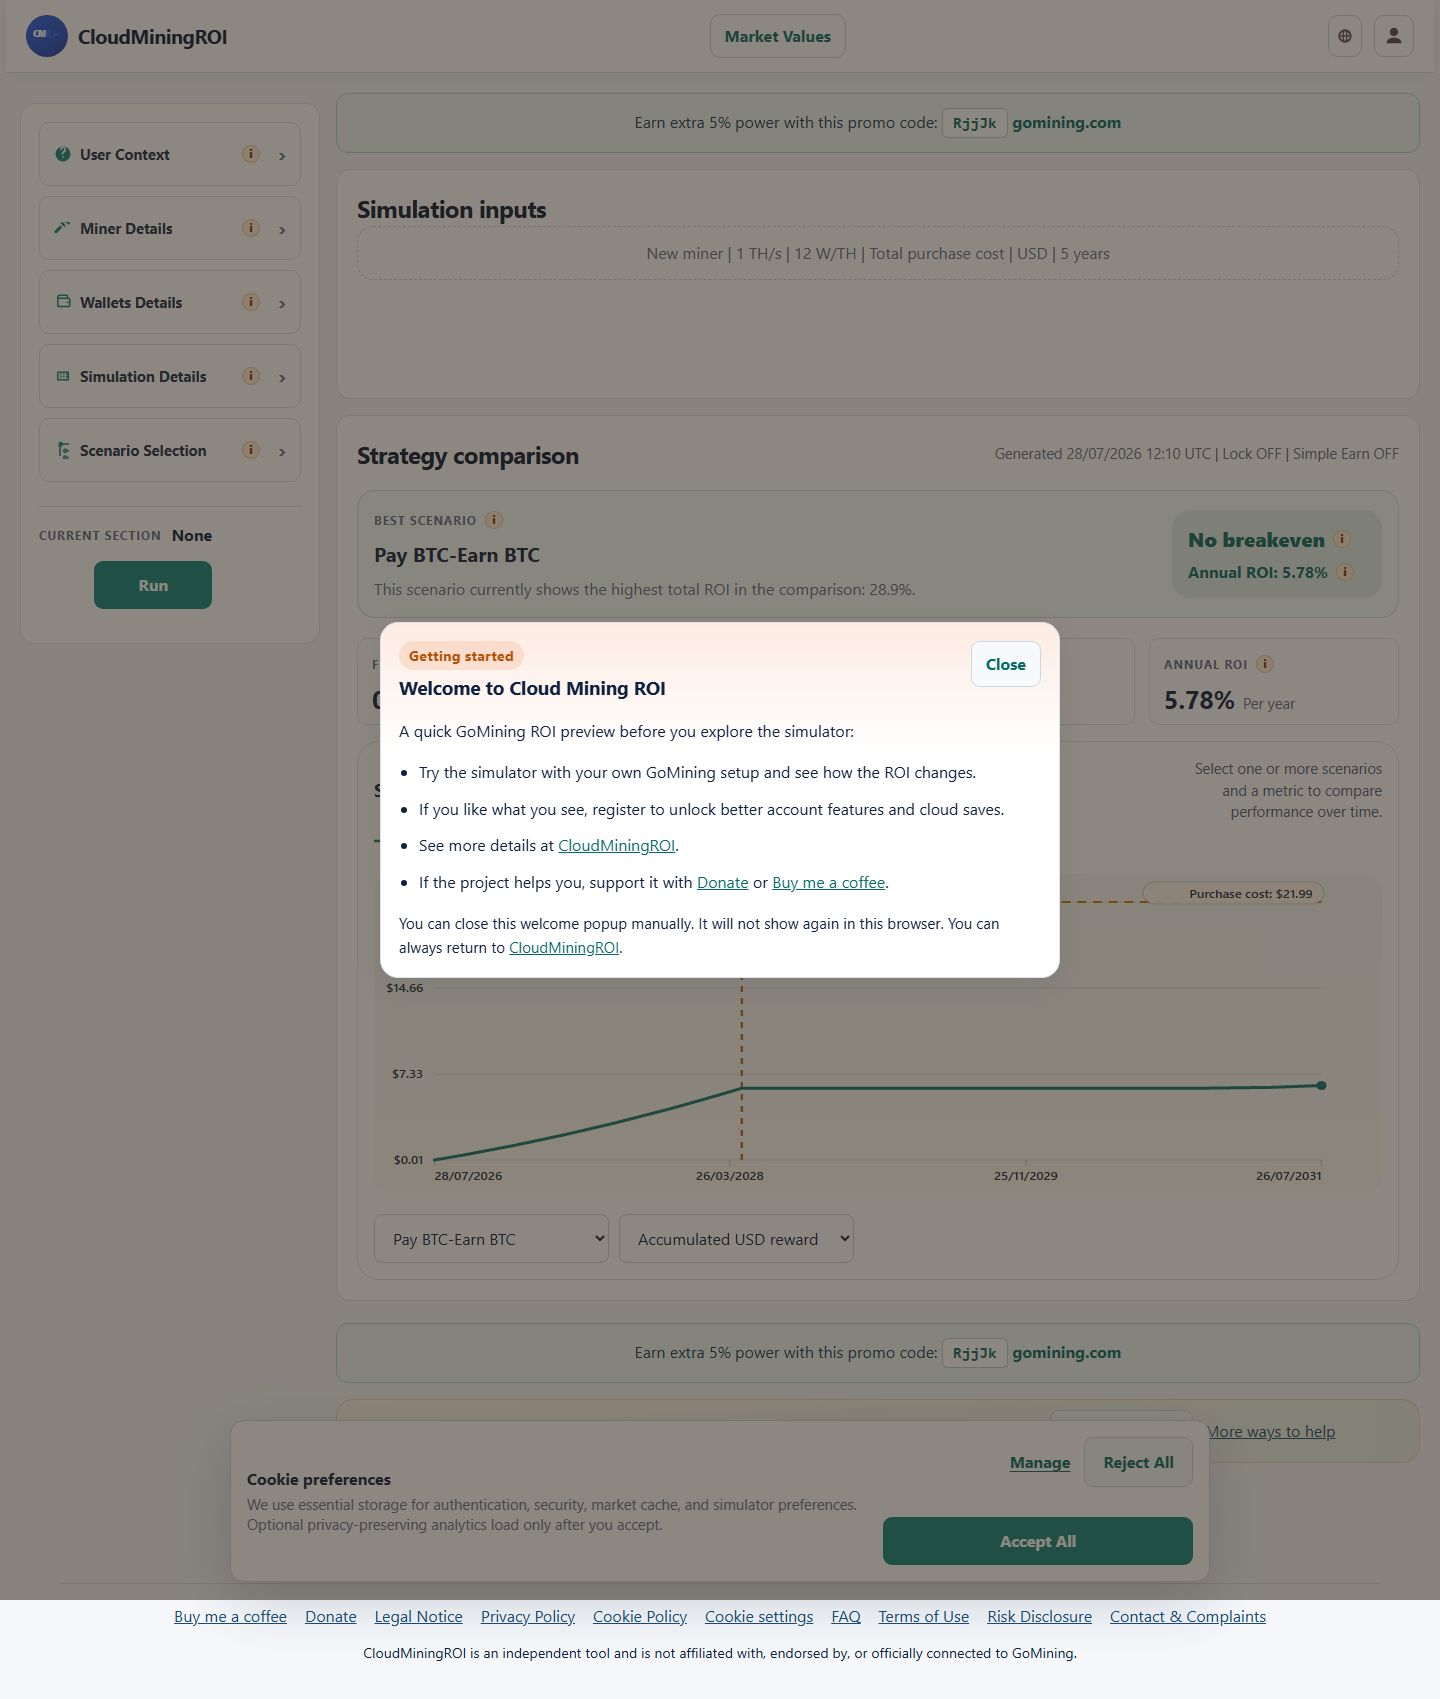
After you run the simulation, the app shows the outcome in the results area.
This is where you read the numbers that matter most.
Where to find it
- Results appear after you press Run.
- Look at the result summary and the scenario chart together.
What you need to fill in
- No new input is needed here.
- The result depends on the values you entered earlier.
What this part does
- Shows ROI, breakeven, and the scenario chart.
- Highlights the best scenario so it is easy to read.
What you should see
- The best scenario should stand out clearly.
- The ROI and breakeven values should match the inputs you entered.
Quick steps
- Press Run.
- Read the best scenario first.
- Check ROI and breakeven.
- Use the chart to understand how the setup evolves over time.
9. Saving, loading, exporting, and importing
CloudMiningROI lets you keep a setup for later or move it to another place.
This is useful when you want to return to the same configuration without typing everything again.
Where to find it
- Use the save, load, export, and import controls in the app.
- They are available from the main controls area.
What you need to fill in
- The current setup you want to keep or share.
- A previously saved or exported setup file.
What this part does
- Save keeps the current setup for later.
- Load restores a saved setup.
- Export creates a file you can keep or share.
- Import opens a file you exported before.
What you should see
- The restored setup should look like the one you saved.
- Imported files should reopen the same values without breaking the app.
Quick steps
- Build the setup you want to keep.
- Choose Save or Export.
- Later, choose Load or Import to bring it back.
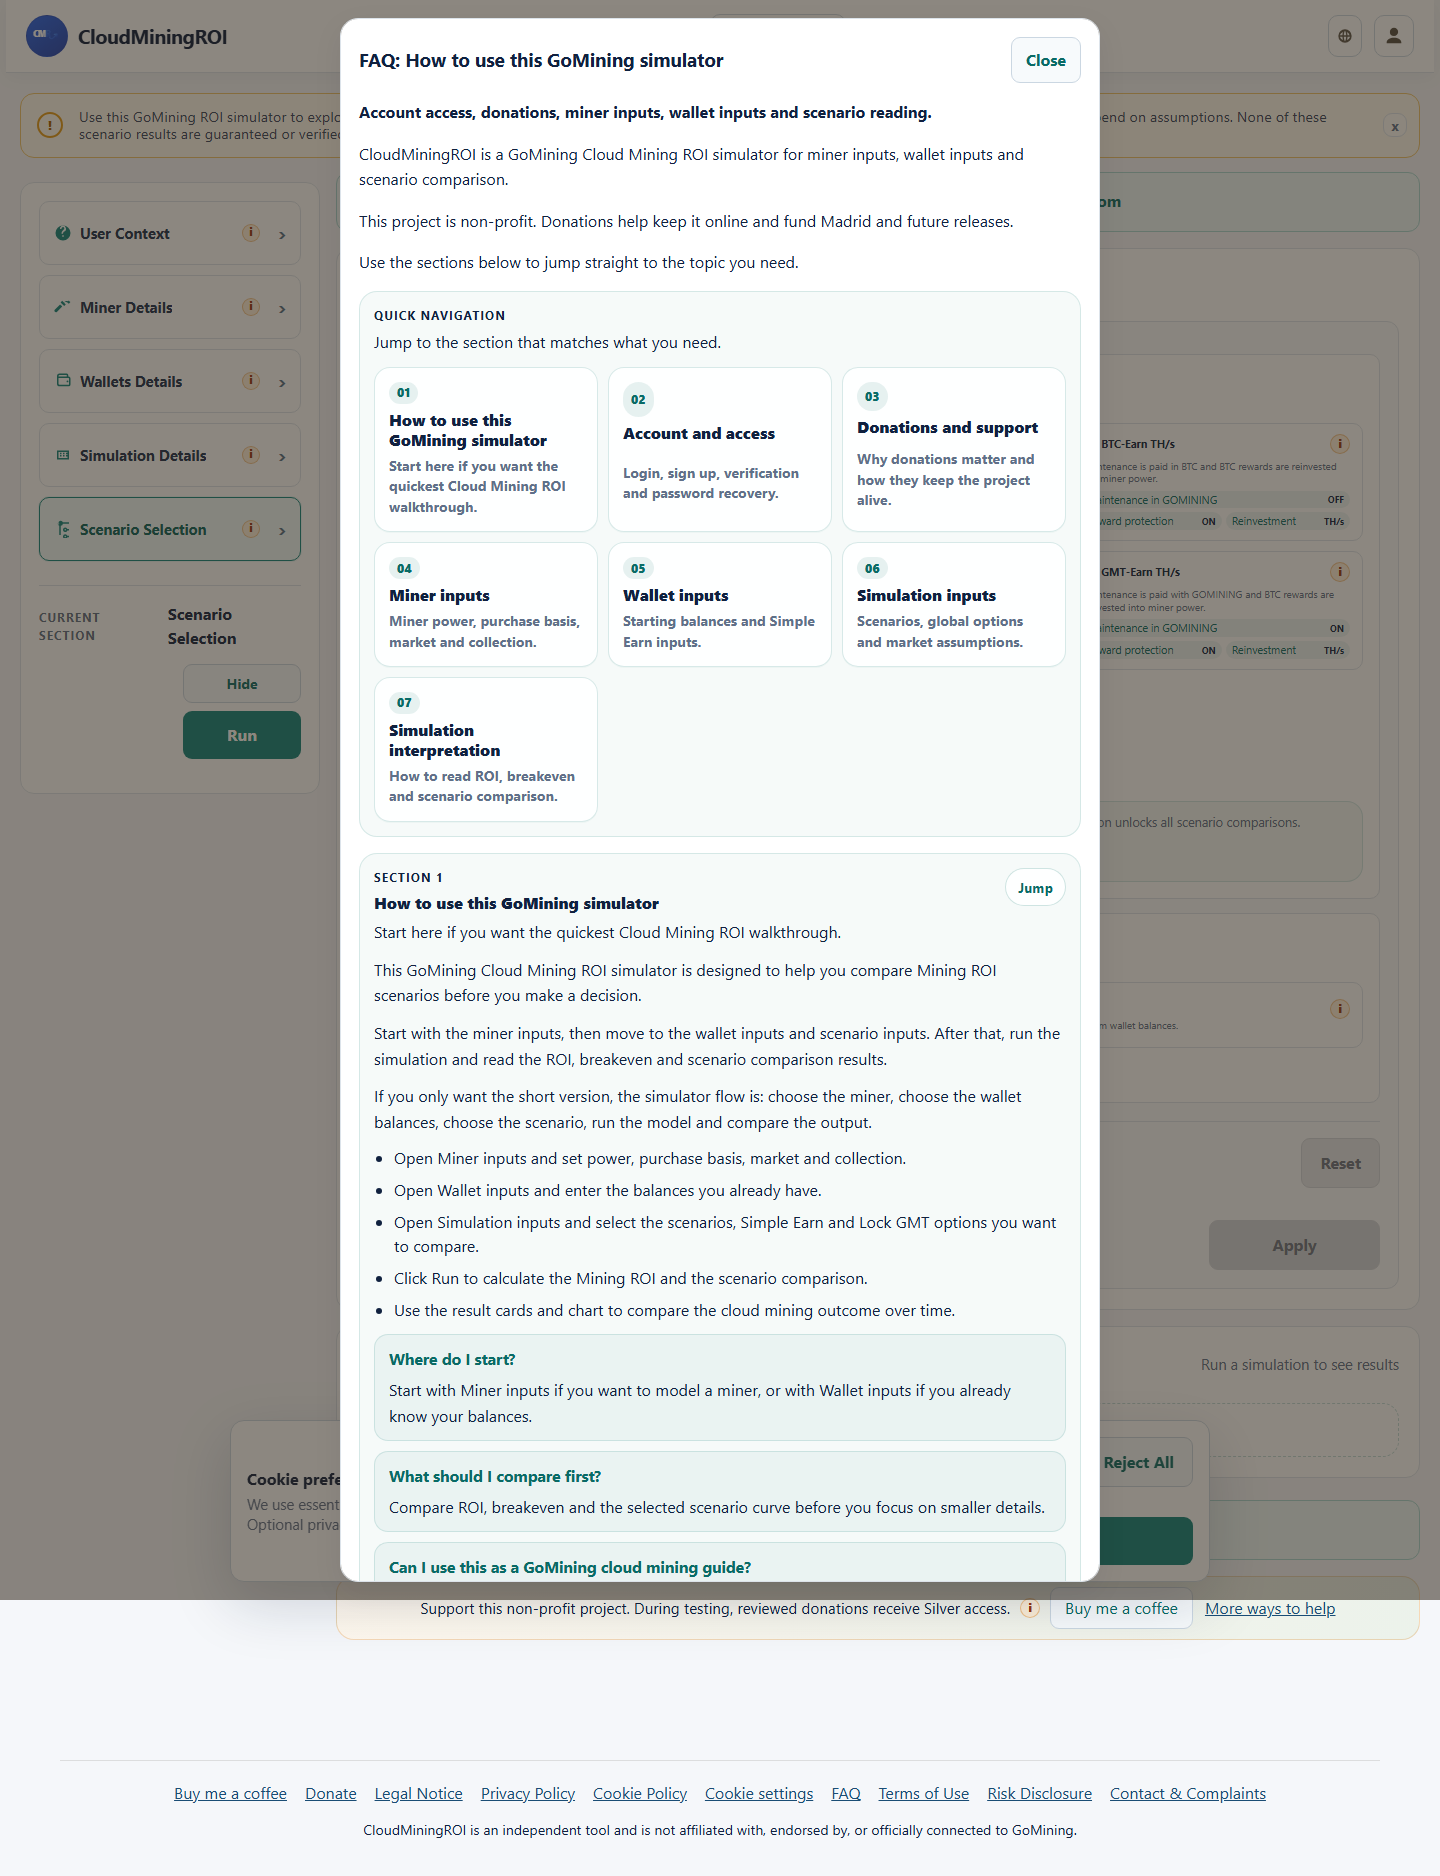
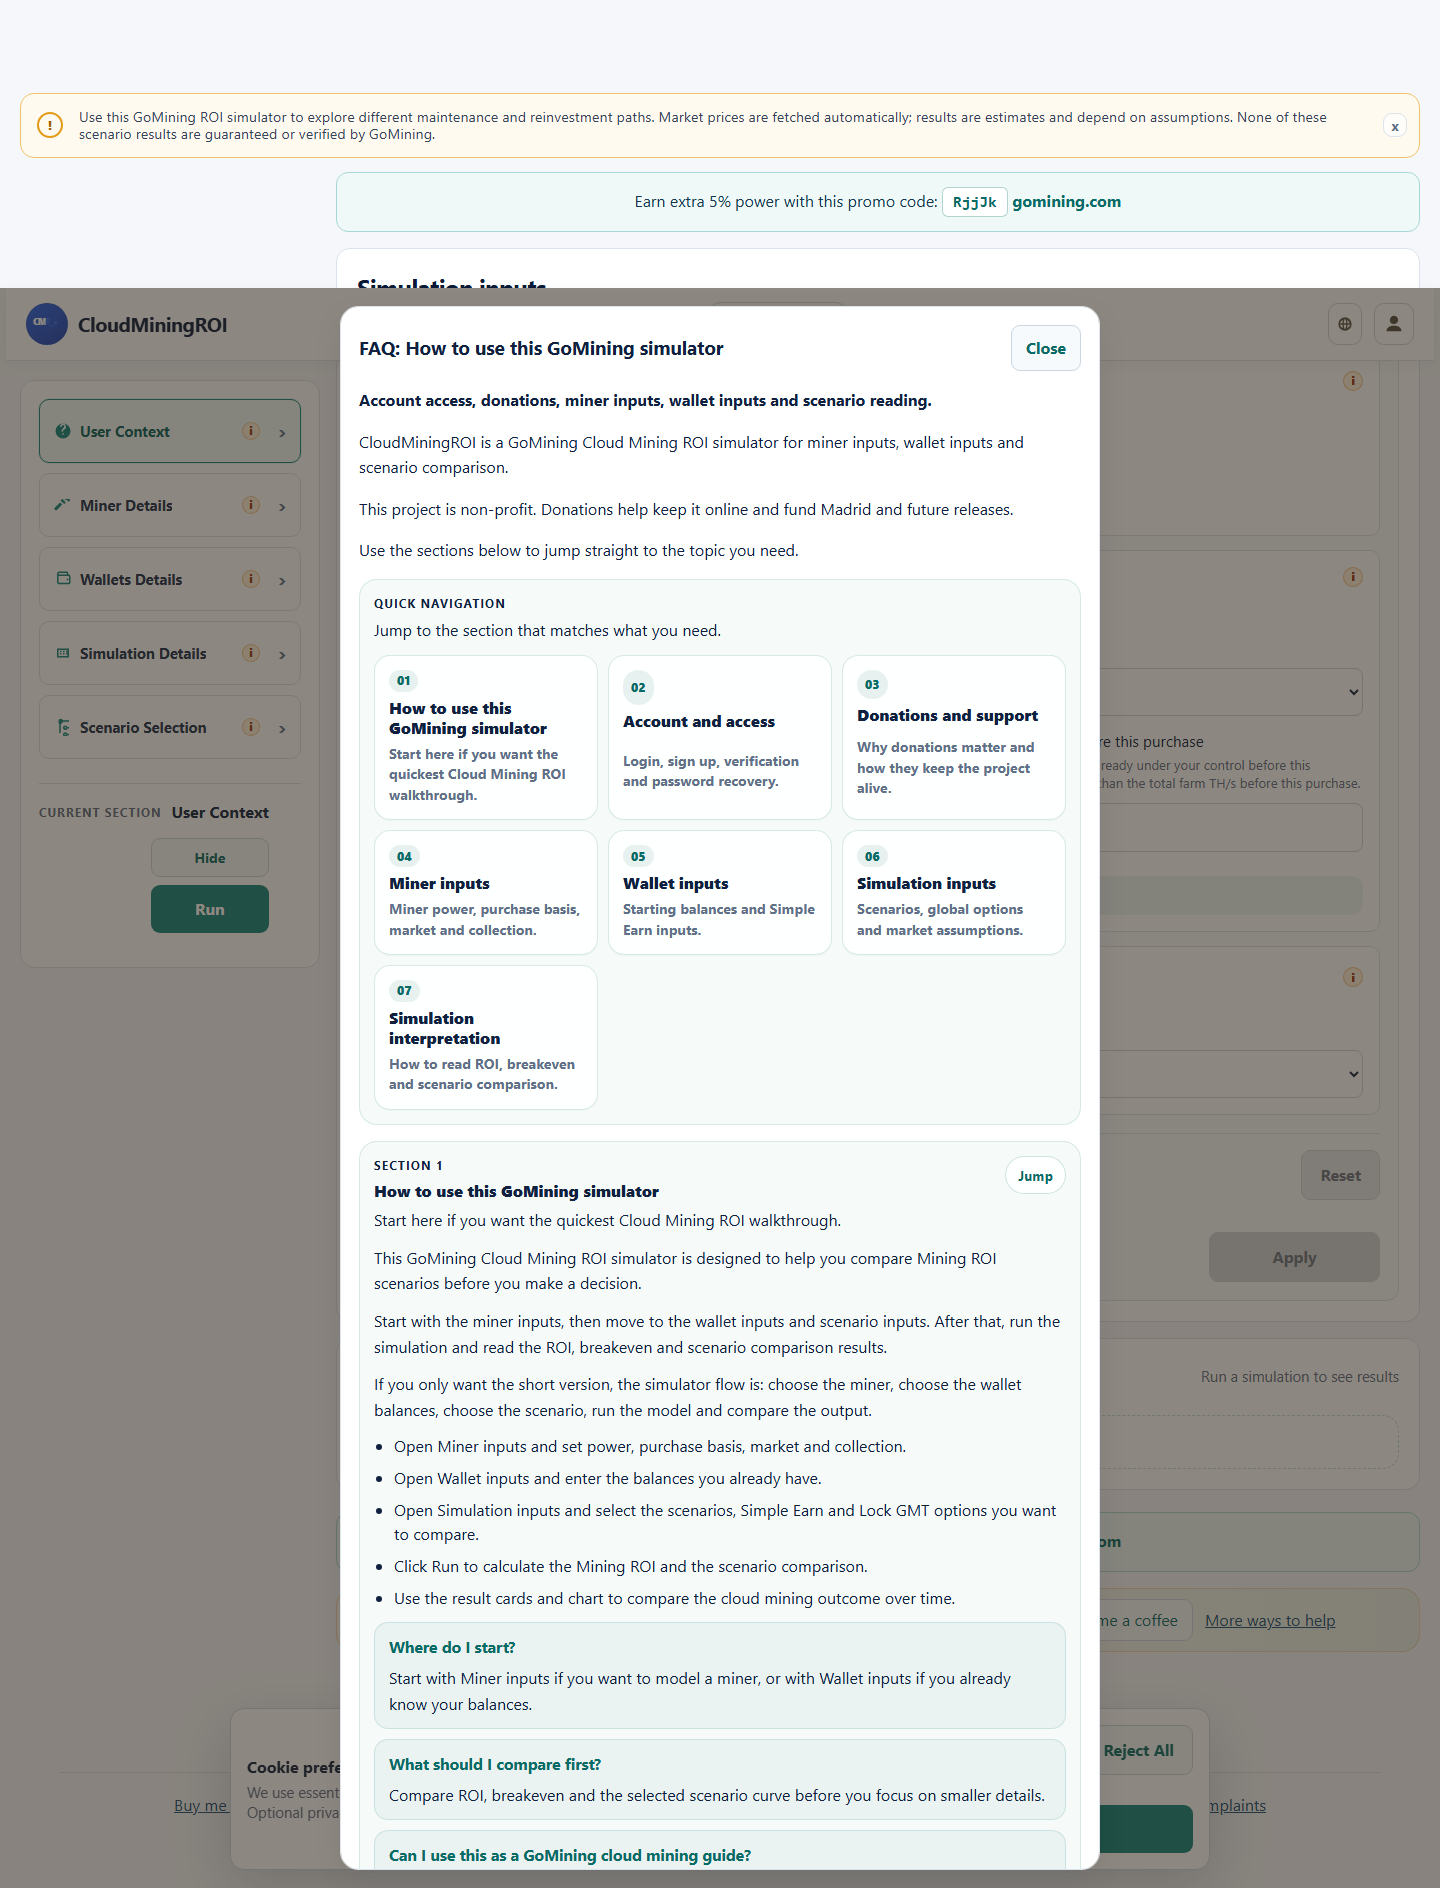
10. FAQ and help
The FAQ is the fastest place to get a simple explanation of how the simulator works.
It is written so a new user can start with very little context.
Where to find it
- Open FAQ from the footer or help area.
- Use it whenever you are not sure what a section means.
What you need to fill in
- No input is required.
- You only need to open the help topic you want to read.
What this part does
- Explains how to use the simulator.
- Covers account access, donations, miner inputs, wallet inputs, and simulation inputs.
What you should see
- The FAQ should answer common questions quickly.
- The section titled How to use this simulator should be easy to find.
Quick steps
- Open FAQ.
- Read the topic that matches your question.
- Return to the simulator and continue the setup.
11. Support and account access
CloudMiningROI includes account access and support options so users can save their work, return later, and help keep the project alive.
CloudMiningROI is a community project and not a for-profit product; donations help us keep the simulator available and up to date.
Where to find it
- Use the account buttons in the top bar.
- Use the support and donation links in the footer or support area.
- Use the same account area when you want to sign in, sign up, or return to a saved setup.
What you need to fill in
- Your login details if you want to sign in.
- Your choice if you want to support the project through donations.
What this part does
- Lets you sign in or create an account.
- Lets you save and recover your simulation setups from your own account.
- Lets you support the project through the public donation options.
What you should see
- The account and support links should be easy to find.
- You should be able to return to the simulator and keep working from the same account.
- Donation links should open the correct support flow.
Quick steps
- Open the account or support area when you need it.
- Choose whether to sign in, sign up, save work, or support the project.
- If you want to keep a setup for later, use the account flow first and then save the simulation.
- Return to the simulator and continue the work.
Screenshot gallery
All available captures used for this manual are listed below.
Home screen
User Context
Miner Details
Wallet inputs
Simulation Details
Scenario Selection
FAQ
User Context scroll view
Tablet home
Tablet Miner Details
Tablet Simulation Details
Tablet Scenario Selection
Mobile home
Mobile Miner Details

Results
Short summary
CloudMiningROI is designed so you can enter your miner, wallet, and scenario settings, run a simulation, and read the result in a clear, step-by-step way.
This manual explains the current user-facing functions step by step so a new user can start using the simulator without extra help.